
Build a WhatsApp Clone with InsForge
Let’s cut the fluff. This post is not about cloning WhatsApp pixel by pixel or shipping the kind of polished fake demo people love posting on LinkedIn. It’s about seeing how a developer who actually knows how to delegate to agents would work today, using InsForge as the backend and letting AI handle the heavy lifting without giving up all control.
The final result looks more like a lightweight Discord with WhatsApp vibes than a pure clone. Honestly, that’s better. For an MVP it makes a lot more sense: login, public rooms, real-time messaging, and fast deployment. If you want to poke around the code, the repo is public here: github.com/edunavajas/whatsapp-clone.
The goal was never to copy WhatsApp, it was to show a real workflow
The point of the video was not to show off UI polish. It was to show how far you can get today if you set the environment up properly. The move was to start from zero, create the repo, wire up the backend, and let the agent handle definition first and implementation after that.
The repository is created publicly on GitHub and pulled locally with the usual command:
git clone https://github.com/edunavajas/whatsapp-clone.gitIn the video there is also this command to confirm the installed skill actually left its footprint in the project:
ls -laThat is one of the first smart decisions in the whole flow. Before smashing code into the project like a maniac, a “Grill with Docs” style skill gets installed so the agent asks questions and pins down the scope. This is the exact opposite of blind vibe coding. First you define what the hell you want to build, then you build it.
And this is the part I miss most in a lot of content like this: what you do after cloning so you are not just staring at the folder like an idiot. The sensible path is simple. First install dependencies and run the app locally to confirm the frontend at least breathes before you bring in backend, auth, or realtime. If that already fails, there is no point chasing ghosts in the data layer.
The flow mentions npm install, but then the actual work continues with pnpm, so the coherent move is to pick one tool and stay with it all the way:
pnpm install
pnpm run dev
That should be enough to open the app locally and validate the basics: it loads without exploding, the main screens exist, and you are not dealing with a half-broken starter from minute one. No drama needed. Just verify the environment boots, the login screen makes visual sense, and the skeleton of the clone is already there.
Then yes, in parallel you spin up the project in InsForge, pick a European region for latency, and authenticate the CLI so the editor can talk to the instance without you manually pasting weird configs everywhere. The important detail is that the flow leaves behind a project.json with the connection data, and that file stays out of the commit thanks to .gitignore. That part is actually well thought out.
The healthy sequence is: clone, install, run local, connect backend, and only then ask the agent to touch tables, policies, and realtime. Skip that order and the usual thing happens: you no longer know whether the bug belongs to the frontend, the environment, auth, or a sloppy interpretation of scope by the agent.
A good MVP is not the one with the most features, it is the one that gets in the way the least
Once the agent starts asking questions, the project stops being “build me WhatsApp” and becomes something much more reasonable. It gets defined as a web app, not a mobile app. It supports multiple users, but without phone numbers. Rooms are public for any authenticated user. Messages are text only. No editing, no deleting, no file uploads in the MVP. There is a default general room and, on top of that, every user can create at most one room of their own.
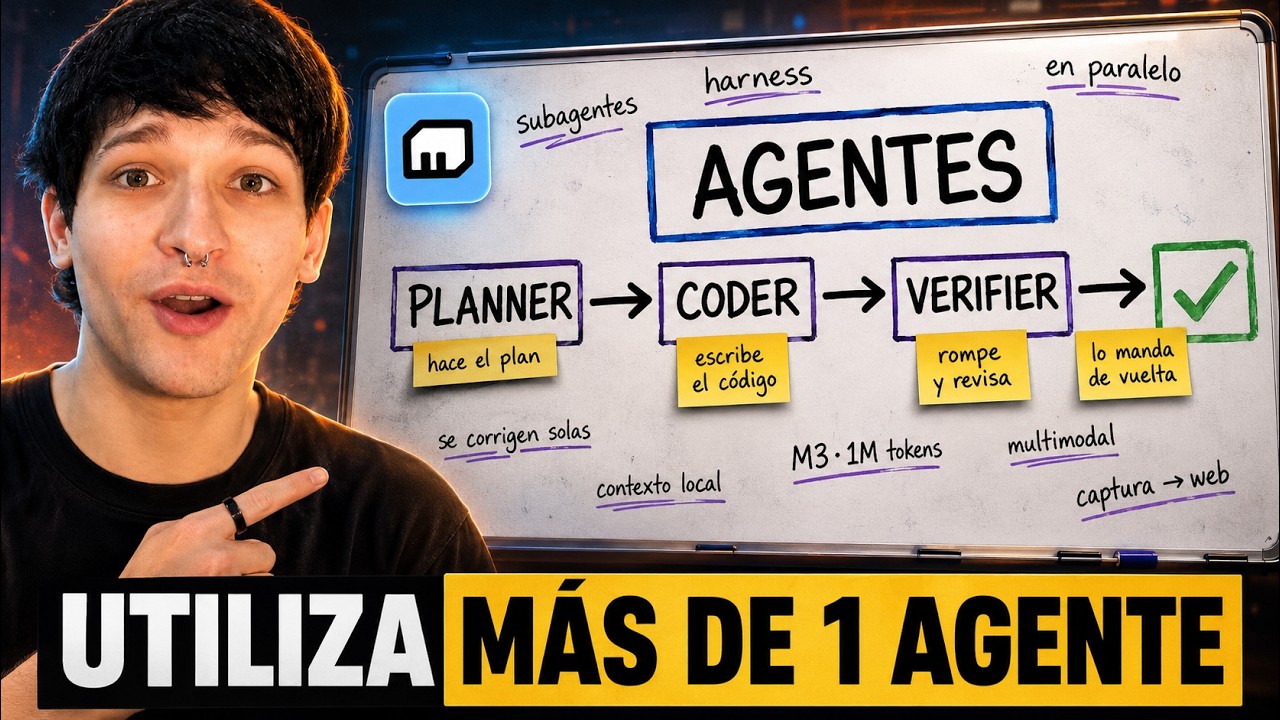
Honestly, this is one of the most useful lessons in the video: if you do not constrain the scope, the agent starts drifting. And once it drifts, you get more code, more context, and more garbage. That is why the author splits the definition conversation from the implementation conversation, saves context to memory, and even switches model for the coding phase. This is not theatrics. It is context management. Stuff the context window with too much history and the model starts getting fuzzy, then people blame the AI when the real issue is that they fed it a giant mess.
Where InsForge genuinely changes the game
This is where it gets interesting. InsForge is not just a pretty database. It is the full backend that the agent can operate from inside the editor: authentication, realtime, security rules, tables, policies, and deployment. If you come from Supabase, the idea will feel familiar fast, but with one important difference: the whole workflow is much more deliberately built for agent-driven work.
The previous post I published about InsForge was already heading in that direction, but this example shows it in a much rawer way. The agent detects that it needs backend, creates the room and message tables, adds triggers, configures policies, and wires realtime so the chat works without manually building the usual infrastructure.
And that matters because the MVP stops being a pile of frontend mocks. Here you have real login, real data, and real-time sync between two separate users. In fact, that is the key validation in the video: open two different accounts in two tabs, type in one, and watch the message appear in the other instantly.
If you clone the repo to repeat the exercise, that is also the validation I would run once setup is done: first make sure you can log in, then enter a room, then send a message, and finally open a separate session to confirm the realtime is not just for show. If any of those four pieces fail, the MVP is not actually done yet, no matter how nice the screenshot looks.
If you want to try the same approach without hand-rolling your own backend from scratch, here is the InsForge link with UTM again, because that is the piece that makes this workflow make sense in the first place.
The best part of the video is that it also shows the mistakes
Thank God for that. Otherwise it would look like the usual dishonest tutorial where everything works first try and then nobody at home can reproduce it.
The first iteration is not great. The design does not fully respect the reference loaded from design.md, email login fails, and the frontend does not really sell that WhatsApp-clone feel they were aiming for. Then a second iteration comes in, Google login gets fixed, and the agent is pushed again to respect the design more closely.
After that a more serious issue shows up: messages are not rendering properly and the chat flow still does not feel finished. At that point the agent is asked to validate with Playwright and keep tightening things up. This matters because it teaches a very clear lesson: agentic development does not mean development with your eyes closed. You still have to look, test, break things, and ask for changes again. Jarvis helps; Tony Stark still needs to understand what he is building.
In the end, after several phases, the result is pretty solid. The interface feels much closer to WhatsApp, login works properly, two accounts can operate at the same time, and messages move in real time. You can even create new rooms, although the video openly admits one limitation: the room list does not always refresh cleanly and sometimes you need to reload to see it properly. That editorial honesty matters because it is exactly what makes the article believable.
If you clone it today, this is the sensible path I would follow
There is no need to turn this into a kindergarten-level tutorial, but the working order should be crystal clear.
Clone the repo and verify you are in the right project:
git clone https://github.com/edunavajas/whatsapp-clone.git
ls -la
Install dependencies with a single package manager and run locally:
pnpm install
pnpm run dev
With the app open, validate three things before moving on. One: the frontend starts without major errors. Two: the login flow feels coherent and not disconnected from the rest. Three: the base chat UI is actually there and not just a pretty splash screen.
Then comes backend. If you are following the video, this is where InsForge enters: create the project, authenticate the CLI, leave the local connection ready, and let the agent set up auth, tables, policies, and realtime. You are not “configuring for the sake of configuring” here. What you want is for the project to stop running on smoke and start working with real users and real messages.
The final check is the real one: two different sessions, two different users, and one message traveling from one to the other in real time. If that works, the demo is alive. If you can also create a room and re-enter it without breaking anything, even better.
The commands that show up in the flow
Since the video mentions specific commands, here they are properly formatted. Some belong to the project itself and others to the local validation flow.
To clone the repo:
git clone https://github.com/edunavajas/whatsapp-clone.gitTo check the files generated by the skill installation:
ls -laFor dependencies, the agent first suggests npm install, even though the video later switches to pnpm out of personal preference:
npm installAnd this is the variant actually used to work locally:
pnpm install
pnpm run dev
At one point the recording shows the installation of a design skill with an on-screen command, but the transcript does not preserve the full string. I did not invent it out of thin air because that would be nonsense. If you want to reproduce that step exactly, the sane move is to pull it straight from the video and the link mentioned there.
What matters is not that one isolated command anyway. What matters is the order of the whole set: dependencies, local server, backend connected, and validation with two users. That is what separates a pretty demo from an MVP that can at least stand on its own.
What I find genuinely useful about this approach
Let’s be honest: the interesting part is not the WhatsApp clone. The interesting part is the pattern. You define the MVP, connect the backend, let the agent propose and execute, review what it did, correct the weak parts, and deploy only once the result passes a minimum human sanity check.
That removes a ridiculous amount of friction. And for a small product or a proof of concept, the difference is huge. Even more so when the backend already solves authentication, security rules, and realtime for you. The video keeps insisting on that for a reason: if table security, login, and access control are already handled by InsForge, you remove one of the trickiest parts of the MVP from your plate.
Now, that does not mean you get to switch your brain off. For a serious product, with real users, more complex architecture, or tighter business rules, you still need more thinking, more review, and much better design. The video makes that painfully clear. This is a workflow demonstration, not an invitation to delegate EVERYTHING and then pray.
Repo, deploy, and the honest conclusion
The finished clone gets deployed from inside the InsForge ecosystem itself, with a platform-generated domain and without having to bolt on a separate hosting story. That part is powerful too because it closes the loop: definition, implementation, backend, and deployment inside one fairly compact workflow.
If you want to inspect the code properly, here is the repo again: github.com/edunavajas/whatsapp-clone. And if you want to try the tool that makes almost all of the backend in this example possible, here is InsForge one more time.
At the end of the day, the message of the video is not “look, AI can code on its own.” The real message is different: if you know how to limit scope, separate context, review iterations, and lean on a backend built for agents, you can ship a functional MVP absurdly fast. And yes, that changes the rules quite a bit.
If you want, after reading this post I would also recommend watching the previous InsForge video and comparing both approaches: one is more conceptual, this one is much more in the trenches. That is where you really start to see why this kind of tooling is beginning to matter.

What do you think?
Leave your opinion, question or suggestion. Comments are synced with GitHub Discussions .